HDZero Radio Operation
This section describes the general operation of the HDZero radio.
Power On/Off
- Press and hold the power button, wait for the HDZero logo to appear on the screen. When the logo is fully displayed, the radio will vibrate once. Then, release the power button and the radio will power on successfully.
- Press and hold the power button, wait for the HDZero logo to disappear on the screen. When the logo has fully disappeared, the radio will vibrate once. Then, release the power button and the radio will power off.

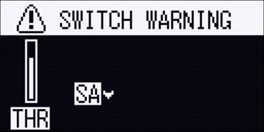
Switch Warning
If the throttle stick is not in the lowest position, move it to the lowest position; if the default “arm” switch SA is pressed down, flip it up.
You can also modify the switch warning check during startup in the Startup Check menu.
Charging
To ensure safety during storage and transportation, the radio battery is shipped with about 3.9V charge.
- Use the USB-C cable to connect the radio to any USB charger.
- When charging, the red LED light on the right side of the USB-C port will turn on; when fully charged, the LED light will change from red to green.
- The maximum charging specification is 2A@5V. Rapid charging is not supported.
- The radio features overcharge protection, so there’s no need to worry about the radio being overcharged.
- When the radio's battery is low, the radio will issue a low-voltage alert, and the buzzer will sound simultaneously with vibration.
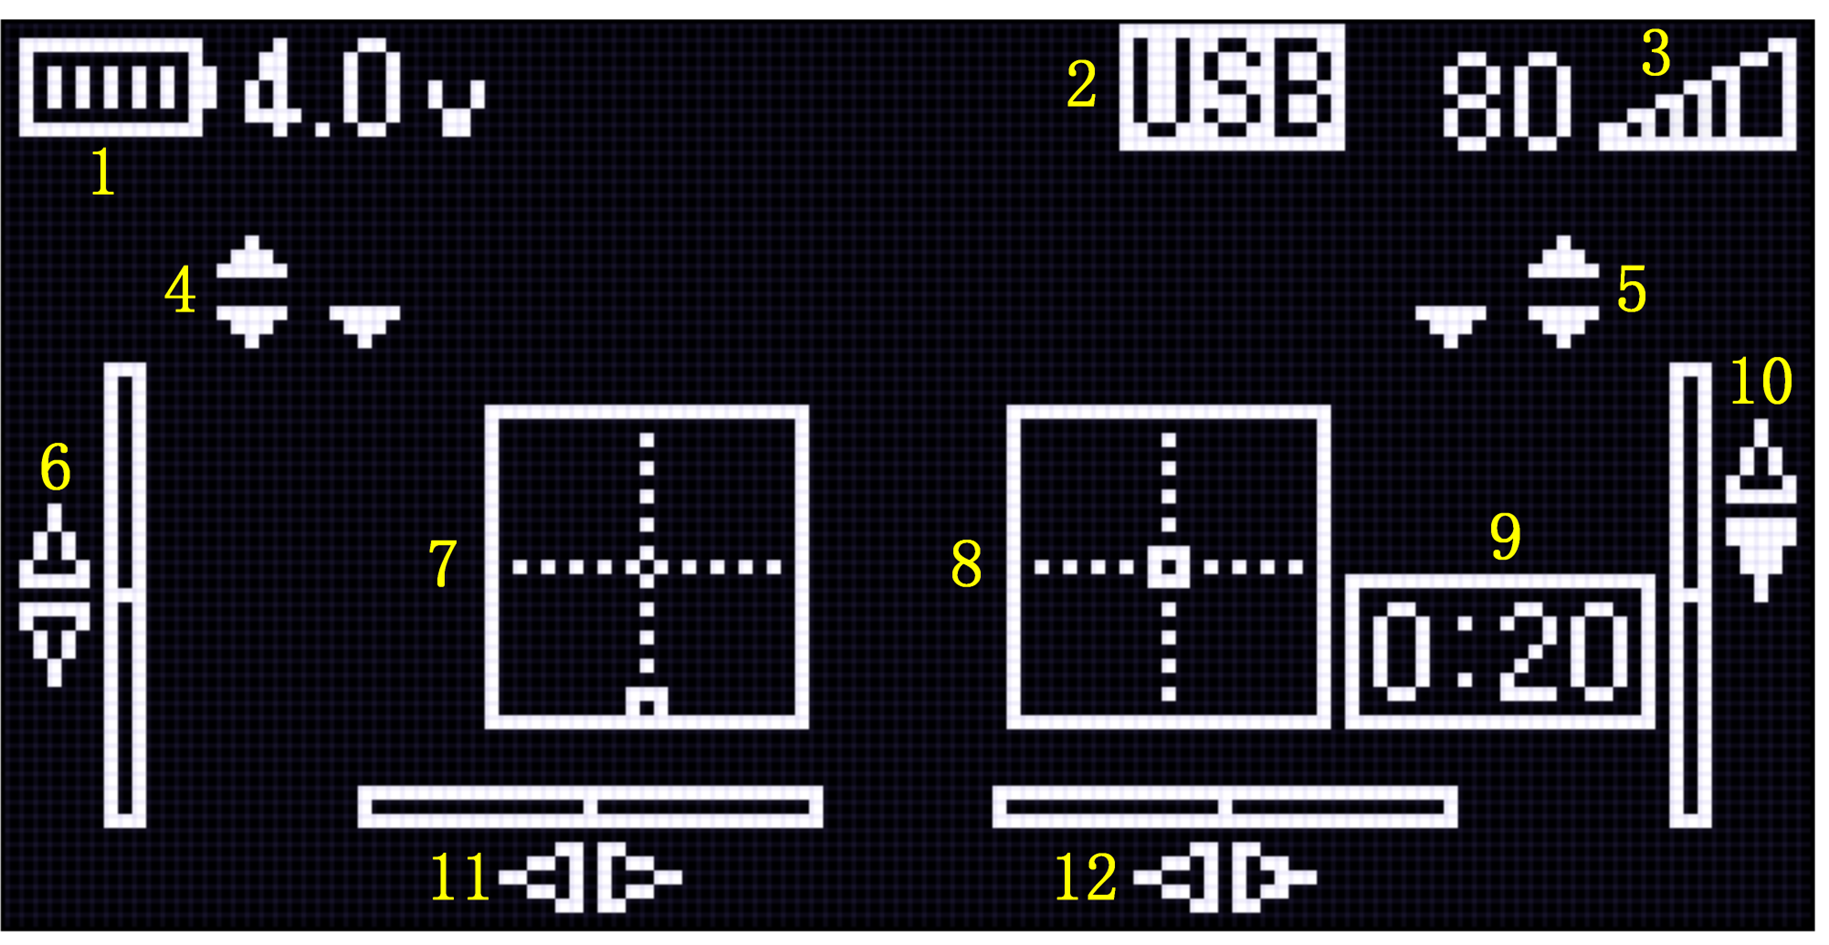
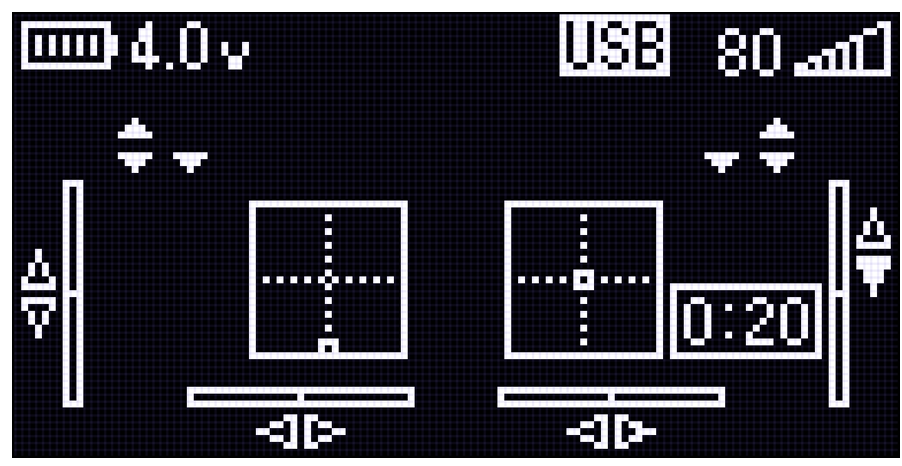
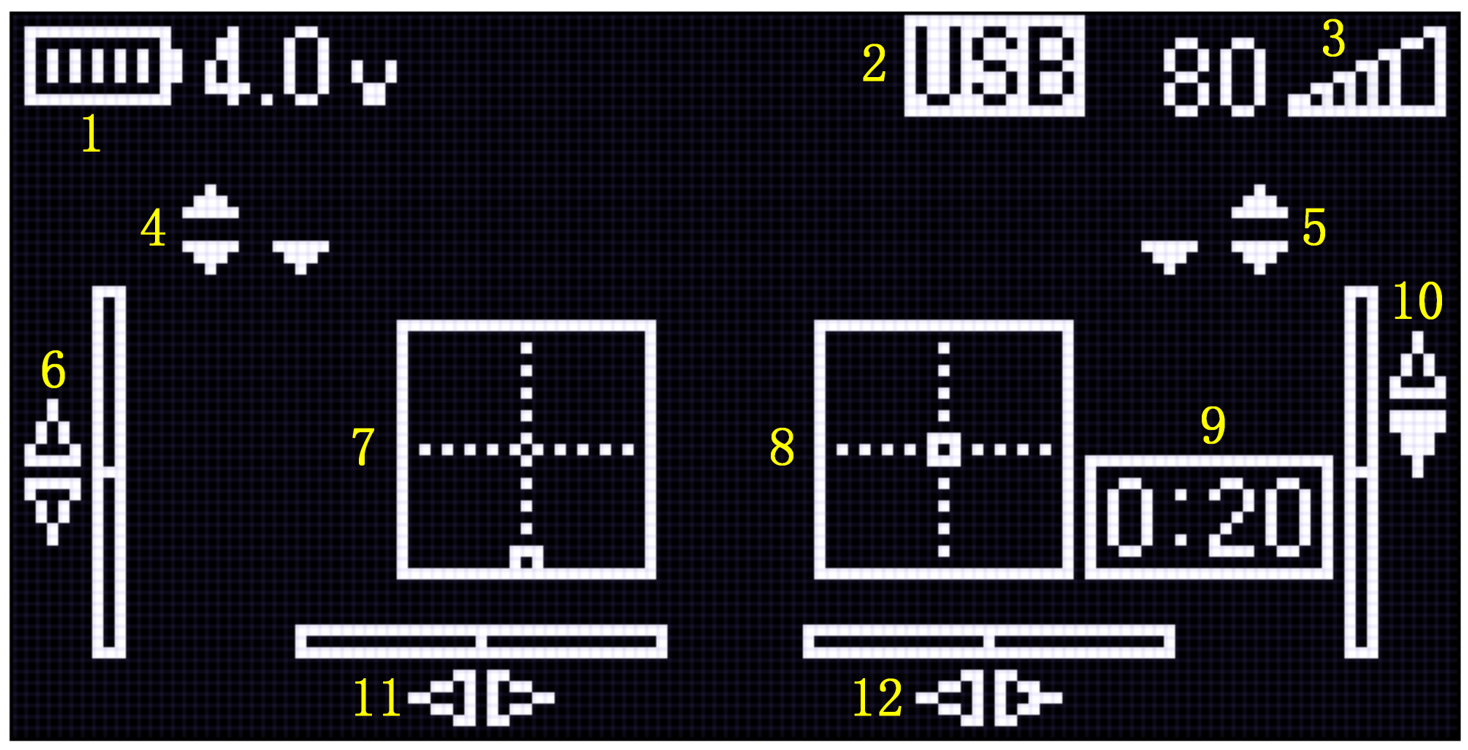
Main View
| Index | Function |
|---|---|
| 1 | Battery Voltage |
| 2 | Connection Mode |
| 3 | ELRS Signal |
| 4 | Left Switch View |
| 5 | Right Switch View |
| 6 | Left Up/Down Trim View |
| 7 | Left Joystick View |
| 8 | Right Joystick View |
| 9 | Timer |
| 10 | Right Up/Down Trim View |
| 11 | Left Left/Right Trim View |
| 12 | Right Left/Right Trim View |
Controls
The menu button is used to switch the radio menu interface and is a five-way button. The main interface, joystick preview interface, and menu interface can be switched left and right using the menu button.

In the menu interface, use the menu button to navigate options up and down. Press the button to confirm and select an option, and press the left menu button to return to the previous menu level.
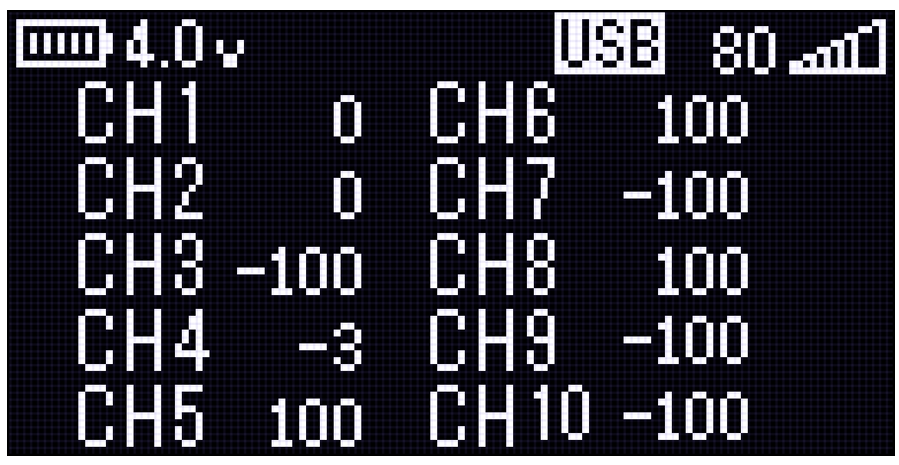
Channel Map
The channel map menu allows changing the output channel order of joystick and switches. By default, the channel map is AETR (default for most flight controllers). To change to another order, like TAER (common for Spektrum and some pre-built models), short press the channel function until “AIL” changes to “THR”. Repeat the process for the remaining channels.
| Channel | AETR(default) | TAER |
|---|---|---|
| CH1 | AIL (Aileron) | THR |
| Ch2 | ELE (Elevator) | AIL |
| CH3 | THR (Throttle) | ELE |
| CH4 | RUD (Rudder) | RUD |
| CH5~10 | Top switches |
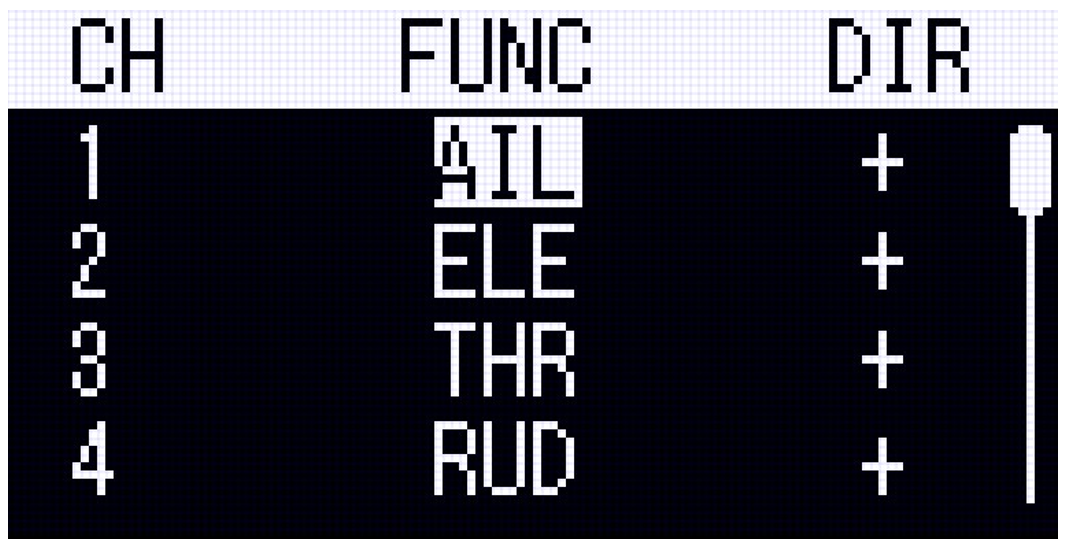
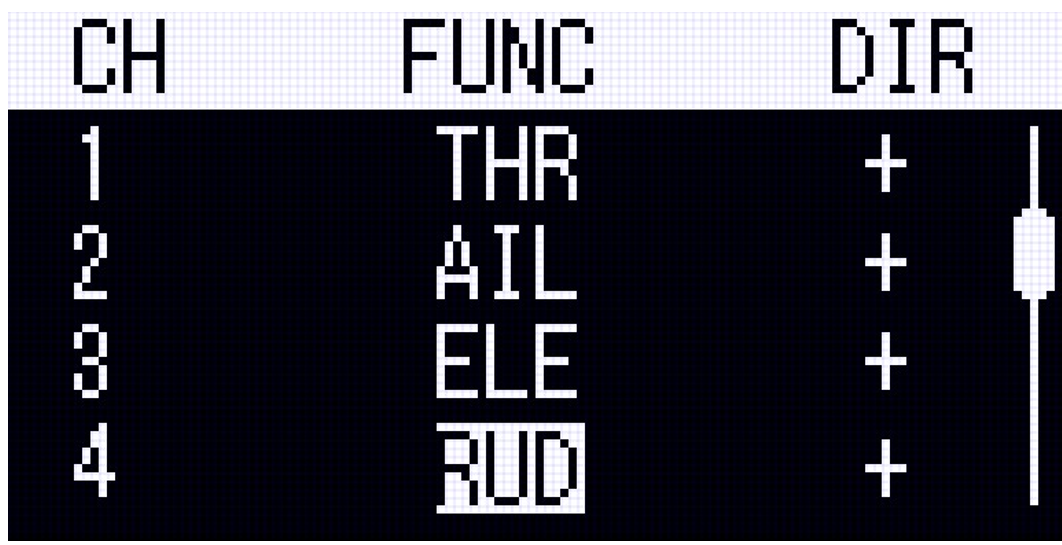
To change the direction of a channel, short press in the “DIR” column.
To change from "Left Throttle" (Mode 2 - default), to "Right Throttle" (Mode 1), short press to toggle between the two. This change requires swapping the left and right side gimbals inside the radio.
Trim
The trim buttons allow manual adjustment of joystick offset to help a model fly straight.
Note: For models with a flight controller, do not trim the joysticks on the radio – allow the flight controller to make these adjustments. If joysticks are not centered properly when at rest, you can perform a calibration in the “Calibration” menu.
To use the trim function:
- Short press the trim button up/down/left/right, and the output of the corresponding joystick will shift up/down/left/right.
- Long press the trim button up/down/left/right, and the output of the corresponding joystick will continue to shift up/down/left/right until released.
- On the main view screen, 6 and 11 indicate the trim for the left stick, while 10 and 12 indicate the trim for the right stick. A solid white triangular indicator means the trim button has been offset in the corresponding direction. A hollow triangular indicator means the trim button is at its central initial position with no offset.
- The radio will vibrate as an alert when the trim button is adjusted back to the center position.
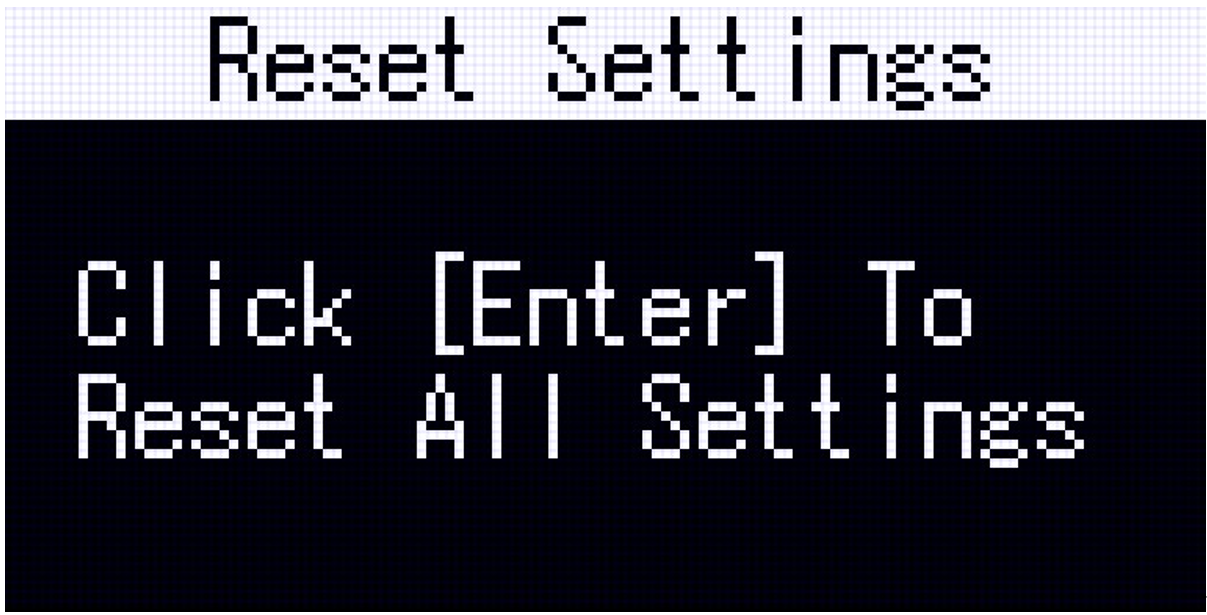
Reset Settings
Reset settings will restore all settings on the HDZero Radio to their initial default values, excluding ELRS settings.
To reset settings, navigate to the Reset Settings menu. Short press the menu button to enter, then short press it again to complete the reset.
Force Shutdown
If you encounter issues such as software freezing while using the radio, you can force a shutdown by pressing a combination of buttons. After restarting, it should resume normal operation.
The combination for forced shutdown is:
Left trim button, right trim button, and menu button. Press and hold these three buttons simultaneously to force the radio off (the order of pressing does not matter).
 Ligen
Ligen